For New Bedford, Massachusetts homeowners looking to enhance their outdoor space, installing a fence offers both privacy and security. This comprehensive guide provides step-by-step tips for DIY fence installation, ensuring a successful project. From planning the layout to choosing durable materials, measuring accurately, and digging posts, we cover it all. Learn how to build a sturdy fence with interlocking panels and add functional gates. Discover essential tools, safety measures, and final touches to create a beautiful, long-lasting barrier that complements your home’s aesthetic.
- Planning Your Fence Installation: Measure and Choose the Right Material
- Preparing the Ground: Digging and Marking Posts
- Building the Fence: Post Placement and Interlocking Panels
- Adding Gates and Fencings: Creating Entryways and Security
- Tools and Safety: Essential Equipment for Installation
- Final Touches: Painting, Maintenance, and Enjoying Your New Fence
Planning Your Fence Installation: Measure and Choose the Right Material
When planning your fence installation, accurate measurement is key to ensuring a perfect fit. Take time to measure the perimeter of the area where you want the fence to be installed. Consider factors like corners, gates, or other obstructions that might affect the straight-line measurements. This data will guide your material selection – whether it’s wood, vinyl, or chain link – and help you choose the right size and style for both functionality and aesthetics.
Choosing the right material depends on your preferences, budget, and climate conditions. Wood offers natural beauty but requires more maintenance. Vinyl is low-maintenance and durable in various weather conditions. Chain link provides maximum security at a lower cost but offers less visual appeal. Each option has its advantages, so select based on your needs and how well the material aligns with New Bedford’s local regulations and neighborhood aesthetics.
Preparing the Ground: Digging and Marking Posts
Preparing the ground is a crucial step in DIY fence installation. Start by clearing the area where your fence will be installed, removing any weeds, plants, or debris. Use this opportunity to assess the terrain and identify any irregularities or slopes that might affect post placement.
Next, mark the locations of your fence posts using stakes and string. This process ensures a straight and consistent fence line. Dig holes for each post, ensuring they are deep enough (typically one-third to half the post’s height) to provide stability against shifting soil.
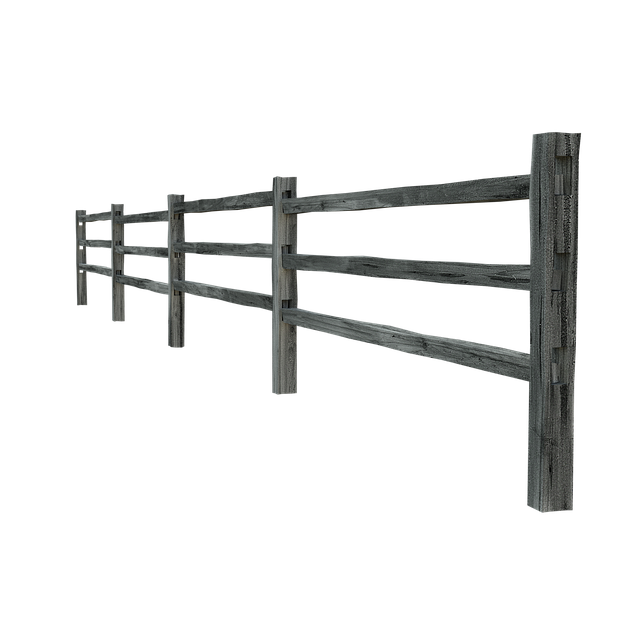
Building the Fence: Post Placement and Interlocking Panels
When building your fence, one of the crucial aspects is post placement. Digging holes for posts should be done at least 3 feet deep to ensure stability, especially in New Bedford’s varying climate conditions. It’s essential to use a level to ensure each post is straight and properly aligned. Interlocking fence panels are a popular choice for DIY installations. These panels fit snugly together, creating a secure barrier without the need for numerous brackets or hardware. By following the manufacturer’s instructions, you can easily assemble the panels, locking them in place with a simple mechanism that enhances both strength and aesthetics.
Adding Gates and Fencings: Creating Entryways and Security
Adding gates and fences is a great way to enhance both the functionality and aesthetic appeal of your New Bedford, Massachusetts property. Gates provide controlled access to your home, creating a secure entryway while allowing for privacy and safety. When selecting or designing a gate, consider its style—a traditional wooden swing gate or a modern sliding metal gate—to match your fencing and overall landscape design. Ensure the gate fits your fence perfectly to maintain a neat appearance and prevent security gaps.
Fences not only define property boundaries but also contribute to curb appeal. They can be used to create distinct spaces within your yard, such as separate areas for pets or entertainment. Consider the type of fencing material—wooden, vinyl, or chain link—to match your climate, budget, and desired maintenance level. For added security, install a fence with a lockable latch, especially if it borders public property or high-traffic areas.
Tools and Safety: Essential Equipment for Installation
When it comes to DIY fence installation, having the right tools is half the battle won. For New Bedford, Massachusetts homeowners undertaking this project, a basic toolkit should include a hammer, wooden stakes, string line, measuring tape, post-hole digger, and a power drill with appropriate bits. These tools are essential for marking out the fence line, digging holes for posts, driving stakes, and securing the fence panels.
Safety is paramount during any DIY endeavor, and fence installation is no exception. Always wear protective gear such as safety glasses to shield your eyes from debris, gloves to protect your hands, and ear protection if using power tools. Ensure clear access to each post-hole site and maintain a steady hand when operating machinery to avoid accidents.
Final Touches: Painting, Maintenance, and Enjoying Your New Fence
Once your fence is installed, it’s time to add the final touches. Painting or staining your new fence not only enhances its aesthetic appeal but also protects it from the elements. Choose a color that complements your home’s exterior and follows the manufacturer’s instructions for application. Regular maintenance, such as cleaning and re-painting every few years, will keep your fence looking its best for years to come.
Enjoying your new fence means taking pride in your property and creating a safe, private space outdoors. Use it for family gatherings, outdoor dining, or simply relaxing after a long day. With proper care, your DIY fence installation will serve as a lasting addition to your New Bedford home for many summers to come.